Sunday, May 6, 2012

Peanut Butter Cookies

I believe I mentioned recently how great peanut butter and chocolate are together.  Well, you're getting more of that today.  To make these cookies you'll need: 1 1/4 C flour, 3/4 tsp baking soda, 1/2 tsp baking powder, 1/4 tsp salt, 1/2 C shortening, 1/2 C peanut butter, 1/2 C sugar, 1/2 C brown sugar, and 1 egg.  Optionally, you might also want as many Hershey kisses as there are cookies, or, if you don't have any Hershey kisses and don't feel like making a special trip to the grocery store, you might instead use about a 1/2 C each of milk chocolate chips, peanut butter chips, and chopped up peanut butter cups (or whatever else happened to be in the pantry at the time).
Preheat your oven to 375.  In a medium bowl, mix together your flour, baking soda, baking powder, and salt and set it aside.  In a large bowl, cream together the shortening and peanut butter until it's smooth.  It'll look rather like a slightly paler bowl of peanut butter.
Now mix in the sugars.  When you measure brown sugar, you're supposed to lightly pack it into the measuring cup.  As we all know, though, brown sugar is the most tasty of sugars, so feel free to pack it tightly.  And then maybe add an extra spoonful for good measure.  Mix in the egg.  Finally, stir in your flour mixture.  If you're using Hershey kisses, skip on ahead to what comes after the next picture.  Otherwise, stir in chips/peanut butter cups.  I'd like to take this opportunity to mention that you ought not to eat raw cookie dough.  That said, this cookie dough is delicious.  Don't you eat it, though.
Resist the temptation!
Now roll the cookie dough into little balls and put on a cookie sheet (I recommend using parchment paper) and into the oven!
Bake the for about 10-12 minutes, or until they're a lovely golden brown.  If you're using Hershey kisses in this recipe, you'll put one on the top of each cookie right after they come out of the oven.  Now just put the cookies on a rack and let them cool for a few minutes before you eat them all!
They were all gone 10 minutes later.

Sunday, April 22, 2012

Peanut Butter Bars

Chocolate and peanut butter.  I don't think there are any two things that go together better, which is why I think Reese's peanut butter cups are the single greatest candy ever invented.  Now, I'm not posting about peanut butter cups today (though I think I might have a recipe around here somewhere), but rather something that's just about as good: no-bake peanut butter bars.  To make these, you're going to need: 2 cups peanut butter, 1 1/2 sticks of butter (softened), 2 cups confectioners' sugar, 3 cups graham cracker crumbs, and 2 cups chocolate chips.


Grease a 13x9 inch pan and set it aside.  In a large bowl, beat together 1 1/4 cups of your peanut butter and the 1 1/2 sticks of butter until it's creamy.  Then beat in one cup of the confectioners' sugar.  Using a wooden spoon, work in the other cup of sugar, the graham cracker crumbs, and 1/2 cup of the chocolate chips.  It'll be kind of crumbly, but that's fine.

Soooo tasty and distressingly rich
Now press the whole bowl-full into your greased pan, smooshing it down and getting the top as smooth as possible.  Set this aside.

In a saucepan over low heat, melt together the remaining 3/4 cup of peanut butter and 1 1/2 cups of chocolate chips.  Just keep stirring it constantly until it's smooth.  Then pour it over the top of the stuff in the pan so it's all covered and stick it in the refrigerator.

I recommend leaving it in the fridge for a few hours before you try to cut it all into bars.  If you don't chill it long enough, when you try to cut it, it all becomes a crumbly mess and the chocolate bit falls off the top and it doesn't look too great for pictures.  Not that I would know from personal experience.  In completely unrelated news, I don't have a picture of the cut up bars because...um...someone broke into my apartment and stole them, but for some reason left all my valuables alone?  Yeah, we'll go with that.

Sunday, April 1, 2012

Chocolate Minty Bars

When you've been out of work for an extended period of time, it can be important to make a good impression upon returning so that your coworkers remember just how much they missed you.  Or, if you don't feel like doing that, just bribe them with sugar so they pretend they're glad to see you again like I did.  To that end, I made some tasty chocolate minty bars.  To do the same you'll need: For the chocolate bit: 6 tablespoons of butter, 1/2 C cocoa powder, 2 C confectioners' sugar, 3 tablespoons plus 1 teaspoon milk, and 1 teaspoon vanilla.  For the minty bit: 3 oz cream cheese (softened), 2 C confectioners' sugar, 1/2 teaspoon vanilla, 1/4 teaspoon peppermint extract, green food coloring.

Line an 8 inch square pan with foil and set it aside.  Now in a saucepan, melt the butter over low heat and add the cocoa, stirring until it's smooth.  Take it off the heat and add 2 C confectioners' sugar, 3 tablespoons of milk, and 1 teaspoon vanilla.  Put it back on low heat and stir constantly until it's all melted and glossy looking.  Pour half of this into your foil-lined pan, spreading it evenly.  Put the half in the pan in the fridge and set the other half aside while you make the minty filling.

In a bowl, beat together your cream cheese, 2 C confectioners' sugar, 1/2 teaspoon vanilla, 1/4 teaspoon peppermint, and a few drops of the green food coloring.  I actually used about 4 times as much peppermint as the recipe calls for--just start with 1/4 teaspoon and go from there according to your taste.  Also, you of course don't have to use green food coloring, but it does make it look prettier.  Just don't be some weirdo and color it orange or something.  Unless you want to mess with people.  Then by all means, turn it some crazy, non-minty-looking color.  After you have this all mixed, take the pan out of the fridge, spread your mint filling over the top of the chocolate, and put it back in the fridge for another 10 minutes or so.
It's green so you know it's mint!
Once that's done, put your remaining chocolate back over low heat and add the last teaspoon of milk.  Cook this, stirring constantly, until the chocolate is all melted once again.  Now pour it over the mint filling and spread it evenly. 

And back to the fridge with it!  This time leave it there for at least a couple hours, until it's completely chilled and nice and solid.  Then take it out, flip the pan over onto a cutting board, remove the foil, and cut into small squares.  And that's it!  You now have a delicious, and nutritious*, treat!  That ought to keep people off your back your first day returning to work.

*Note: Chocolate minty bars are in no way nutritious.

Monday, March 19, 2012

Macaroni and Cheese

It occurred to me that it's been far too long since I posted anything.  While I could say that it's because I've been recovering from recent unpleasantness (which is true), I've actually just been far too busy playing Mass Effect 3.  But, since I beat that the other day (damn you, Bioware!  you'd better have some good DLC planned to fix what you did!), I figured it was time for a new recipe.

One of the things that my loving mother made for me while I was convalescing was her homemade macaroni and cheese.  You know that slogan for Kraft Macaroni & Cheese, "it's the cheesiest"?  Yeah, no.  This is.

You'll need: 2 C uncooked elbow macaroni, 1/4 C flour, 1/4 C butter, 1 tsp salt, 2 1/2 C shredded cheese (whatever kind you want; Mom used 1 1/4 C sharp cheddar and 1 1/4 C colby jack), and 2 C milk.


Preheat your oven to 350 degrees.  Boil your macaroni in a big pot.  While that's going, in a large pan over low heat, melt the butter and combine it with the flour and salt to make a rue.

This is what a rue looks like.
Now add the milk and heat it up until the sauce thickens, stirring constantly.  Now add your cheese and keeping cooking and stirring until it's completely melted.  (By the way, this is also a really good cheese sauce for something like broccoli or cauliflower.)

CHEESE!!!

All melty!
By now your macaroni is probably cooked nicely.  Drain it and put it in a large oven-safe bowl or casserole dish and pour your cheese sauce over the macaroni.  Stir it all up to get everything nice and coated.  Now, you could be all traditional and put bread crumbs or something on top.  OR, you could ADD MORE CHEESE!

Told you it was the cheesiest.
Put it in the oven and bake for about 25 minutes.  And there you have it; super cheesy, and super delicious, macaroni and cheese!  And if this seems like an awful lot of macaroni and cheese to try and eat up, don't worry; it freezes really well.

Thanks Mom!

Sunday, February 26, 2012

Cheesecake

Ah, cheesecake.  Other than Oreo truffles, this is probably the recipe I get asked to make the most often.  It's also another recipe that's easier to make than you might think.  What you'll need are: 1 1/4 cups graham cracker crumbs, 1/4 cup sugar, 1/3 cup butter (melted), 2 8-oz. packages of cream cheese, 1 14-oz. can sweetened condensed milk, 3 eggs, 1/4 cup lemon juice, 1 8-oz. container sour cream.
I recommend leaving your cream cheese on the counter for at least a couple of hours to soften it up; it makes it easier to work with.  Now, before you do anything else, put a sheet or two of aluminum foil in the bottom of your oven.  Trust me, you'll thank me later.

Preheat your oven to 300 degrees and grease the bejeebus out of a 9-inch springform pan (unless you like having the cheesecake stick horribly to the pan).  In a medium bowl, combine your crumbs, sugar, and butter.  Press this mixture into the bottom of the nicely greased pan and set it aside.
Having a giant dent in your pan is entirely optional
In a large mixer bowl, beat the cream cheese until it's rather fluffy, then beat in the sweetened condensed milk until smooth.  Now beat in the eggs and lemon juice and pour it all into your prepared pan.
There may be a few lumps--that's ok!
Now bake it for 50 minutes, or until the center is set (it's not all goopy).  I'd recommend getting your sour cream out of the fridge about now too, since at the end of 50 minutes, top your cheesecake with the sour cream and bake it for another 5 minutes.  This is why I had you put that foil down way back at the beginning.  As the sour cream cooks, some of it will evaporate, and when your oven cools, it'll all fall right back down to the bottom of your oven.  Then the next time you turn on the oven, guess what fills your kitchen with an incredibly stinky smoke?  Just remember to remove the foil once your oven has cooled off again.

Anyway, now just cool your cheesecake and you're all done!  Now that wasn't so bad, was it?

So delicious.

Wednesday, February 15, 2012

My Medical Fun

This post is a bit of a departure from tasty recipes, fun vacation pictures, or reviews and delves into the scary world of personal issues, specifically medical ones.  Don't worry; later on this week I'll try to get around to posting something delicious to make up for it.  Maybe a cheesecake recipe.

So it seems over the last couple of years (most likely that long, anyway), one of my ovaries has gotten delusions of grandeur and has waged a campaign to slowly take over my insides by way of a cyst.  Minus any pain, lacking changes in the way certain body functions have always operated, and increases in my gym activity coinciding with it starting to grow, this insidious plot was able to continue unabated until my wily doctor (not to be confused with Dr. Wily) detected something amiss during my yearly physical and sent me off to have an ultrasound. 

Sure enough, a mass that looked suspiciously like a cyst was discovered and I was next sent off to have an MRI (well, actually two MRIs).  I'm really really glad I'm not claustrophobic.  I was about ready to claw my way out of the MRI machine by the end, though, but that's only because I hadn't been allowed to move or breathe very deeply for about an hour and fifteen minutes by the time I was done.  Plus, it was super loud in there.  I'd been warned beforehand about that, but no amount of warning could have prepared me for the reality!  Anyway, a few days later I got a call from the doctor's office telling me that, yup, there's a big ol' cyst there, it needs to go, and I'm being referred to a surgical oncologist for a consult.  At this point I didn't really ask any questions, mostly because I happened to be in the work van with my boss when I got called.  Not really a conversation I felt like having in front of the old man.

 It was at this appointment that I finally thought to ask just how big this thing actually was.  I knew that it was supposedly "very large", but really, how large could that possibly be?  There's only so much room in one's insides, what with all those organs in there, right?  So, maybe like the size of my fist?  Ah, no.  Bigger than that.  Think comically large.  Think football-sized.  Yeaaaahhhhhh.  I was also going to be further referred to a gynecological oncologist.  I had that appointment today.

I'll be having surgery to get the monstrosity removed on March 1 and there's good news and possibly bad news.  Bad news first: there's a possibility that the offending ovary and tube will have to be removed.  This is the only part of this medical saga that's gotten me upset (other than some now-resolved snafus involving insurance).  I do want to have kids someday and that won't help.  But, it's still only a possibility, I'll cross that bridge when I come to it, and in the meantime I'll try not to think about it too much.  Now, good news!  I will most likely lose at least ten pounds just from having the surgery!  Plus, this godforsaken beastie has been causing me to retain fluid in my legs, so that'll clear up.  And!  I'll most likely have more energy after this is all over with!  I see some new-pants-shopping in my future.  The amount of time I'll have to be out of work should be less than I'd feared as well; probably only two or three weeks as opposed to the six I was expecting. 

My parents will be coming to take care of me, their favoritest child, the day before the surgery and plan on staying for about a week.  My sister (the least favorite daughter) is coming too, and will stay for a few days.  Plus, a friend will be taking the day off to assist with family-wrangling (specifically mother-wrangling) duties.  Though I think my mother has finally calmed down with regards to all this, thanks at least in part to my own general nonchalance about the whole thing.  We'll see.

So that's what's going on with me.  How've you been?

Monday, February 6, 2012

Galaxy Cookies

Today's recipe is brought to you by my mom's old and falling apart Betty Crocker cookbook.  I remember her making these when my brother, sister, and I were really young and I still think they're just great.  If you've got kids (or steal someone else's kids), this can be a fun recipe to make with them. 

So, get out 1/2 cup butter (softened), 3/4 cup confectioners' sugar, 1 tablespoon vanilla, food coloring, 1 1/2 cups flour, 1/8 teaspoon salt, and a bunch of cherries, chocolate pieces, nuts, of whatever you feel like putting in these cookies.  And while you're at it, preheat your oven to 350 degrees.


Mix together your butter, sugar and vanilla.  You can do this with a wooden spoon, but I personally recommend using an electric mixer (or your stand mixer for you fancy-shmancy people).  Add in a few drops of your food coloring, too, to make your dough pretty.  Or you can leave it all dull.

Booooring beige

Beautiful blue!

Pretty pink!

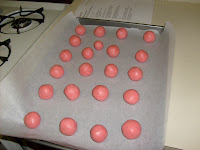
Now gradually work in your flour and salt until your dough looks rather like the above pictures.  If the dough is too dry (and mine always is), add in some milk, a tablespoon at a time, until it comes together.  Mold the dough around whatever it is you've decided to put in the middle and roll it into balls.  You're going to have a different number of cookies depending on what you decide to put in them.  I made two batches; one with peanut butter cups inside (blue), the other with maraschino cherries (pink). 

As you can see, I ended up with quite a few more cherry-filled cookies than peanut butter cup ones.  Anyway, put your cookies about an inch or so apart on your cookie sheets and bake them for 12-15 minutes, until they are set but NOT browned.  Really, what would have been the point of making them pretty colors if you turned them brown in the oven?

Once they're cooked, cool them completely and make your icing.  You'll need 1 cup confectioners' sugar, 1 1/2 tablespoons milk, 1 teaspoon vanilla, and food coloring.

And all the sprinkles the grocery store had in stock
Just mix your ingredients until smooth.  Now just slap some icing on your cookies and you're done!  Of course, you can get really fancy here, using all kinds of different colors and piping designs on the cookies.  Or, you can be lazy like me, make one color of icing, and dump all kinds of different sprinkles on the icing before it hardens.  It's your call.  And this is probably the part of the process that those kids you came into possession of at the beginning of this post can really have fun with.  Just put your cookies on a rack over a cookie sheet and let them go nuts!

You, too, can have delicious blurry cookies!!