Probably one of the most sensible meals you can cook for one (or two if you're a little less of a misanthrope!) for Thanksgiving, while still keeping that air of tradition, is Cornish hens. These are fairly small birds, but still good for stuffing. Plus, you can make a small green bean casserole, cranberry sauce (a normal batch, cuz that stuff is AWESOME), and tiny pumpkin pies. After giving it some thought, I decided to write these all down in the order that I actually made them. So let's start with the pie and cranberry sauce, which I made the night before!
For your pie crusts, you'll need 1 1/2 C flour, 1/2 teaspoon salt, 1/2 C shortening (or lard), and 1/4 C cold water. For the filling, you'll need 3/4 C sugar, 1/2 teaspoon salt, 1 teaspoon cinnamon, 1/2 teaspoon ground ginger, 1/4 teaspoon ground cloves, 2 eggs, 1 (15 oz.) can pumpkin, and 1 (12 oz.) can evaporated milk.
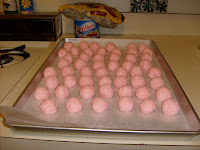
In a large bowl, combine your flour and salt. Mix in your shortening using either a pastry blender or your hands. You might want to put the shortening in the freezer for a little while before you do this; cold shortening is easier to work with. Once the shortening is mixed in, stir in your water a little bit at a time with a fork until your dough sticks together but isn't too wet. Divide the dough into two balls, wrap them in plastic, and put them in the fridge for about 30 minutes.
After they've had time to chill for a bit, take them back out and divide the balls in half again and start preheating your oven to 375 degrees. Now it's time to roll out the dough. Sure, you could do this on a floured surface and try to keep your dough from sticking to the counter and your rolling pin. OR, you can roll out your little dough balls between two sheets of wax paper.
Guess which one is about a million times easier to clean up? Once the dough is rolled out, put it into little 4 1/4" pans. I couldn't find any tiny pie plates, so I used tart pans instead. You should end up with four little pies.
Set those aside and start on the filling. In a small bowl, mix together the sugar, salt, cinnamon, ginger, and cloves. In a large bowl, whisk your eggs and stir in the pumpkin and your sugar and spices. Then stir in the evaporated milk.
Pour the filling into your little pie crusts. Now at this point, you might notice you still have about half of the pie filling left. Not to worry! You can cover it and put it in the fridge and then Sunday night cook it up as a custard that you bring to your coworkers on Monday.
Put your pies in your preheated oven on the lowest rack (I'd also put a cookie sheet under them just in case of spillage) and bake them for about 35 minutes, or until a toothpick inserted about halfway between the crust and the center comes out clean. Let them cool on a rack and store them in the refrigerator. And if you want some whipped cream to go on them, just beat together a cup of heavy cream, a tablespoon of sugar, and a teaspoon of vanilla. Use chilled beaters and, if possible, a chilled bowl as well.
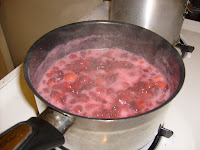
While the pies are baking, it's time to start on the cranberry sauce! For this you need a 12 oz. package of fresh cranberries, 1 C sugar, and 1 C water.
Once it's boiling again, reduce the heat a bit and let it continue to boil for about 10 more minutes or so. The cranberries are going to start popping and might spit a bit, so watch out!
Once it's all nice and thick, turn off the heat, pour it into a bowl and cover it until it cools down a bit and you can put it in the refrigerator.
Let's move on to the main event: the Cornish hens and stuffing! For this you'll need two Cornish hens, around 2 C stuffing mix bread crumbs, about 3/4 C chicken broth, a small onion, some mushrooms, a couple tablespoons of butter, and some sage and salt and pepper. Also, preheat your oven to 350 degrees.
First, chop up the onion and mushrooms and sautee them in a bit of butter until the onions are nice and tender.
In a large bowl, combine the bread crumbs (I actually used closer to 3 cups, which was a little too much), chicken broth, onion, mushrooms, and a bit of sage (I think I used about 3/4 of a teaspoon). Make sure to taste it to see if you need to add any more seasoning.
Now rinse off the birds, inside and out, and remember to remove the little bag of giblets from each one. Also, if you have rather small hands, you can stick a bird on each hand and have yourself a little fun using them as macabre hand puppets! Not that I would ever do such a thing myself, mind you. I'm just saying you could, if you were so inclined.
Time to stuff those birds! Get as much in there as you can. If you've got way too much stuffing, you can put the extra in an oven-safe dish and bake it for the last 30 minutes the birds are in the oven. Put your hens in a roasting dish, pour some more chicken broth in the bottom of the pan (we don't want our birds drying out), and put parchment paper around the hens wherever they're touching the sides of the pan. This will keep them from sticking to your roasting pan.
Brush some melted butter on them and season them with a bit of salt and pepper, and put them in the oven, uncovered, for about 15 minutes. At the end of 15 minutes, cover them and leave them to cook for another 45-50 minutes. Finally, uncover the hens again, brush them with some more butter, and crank the oven up to 400 degrees. This will help brown them a little bit as well as get our oven preheated for our little green bean casserole. When you think the hens are done (after a total cooking time of around an hour and fifteen minutes), check them with a meat thermometer. Make sure you also put the thermometer in the center of the stuffing. Once you're satisfied they're cooked, take them out of the pan, remove the stuffing, and cover them with a little tin foil tent to rest for a bit.
During that last 15 minutes of cooking time, you should start prepping your green bean casserole to go in the oven. For that, you'll need 1/2 C cream of mushroom soup, 3 tablespoons milk, 1/2 teaspoon soy sauce, 1 1/3 C frozen cut green beans, thawed, 1/2 C french fried onion, and a bit of pepper.
Combine the soup, milk, soy sauce and pepper and add in the green beans and half of the onions. Pour this into a small baking dish and top with the rest of the onions. Bake at 400 degrees for about 15 minutes.
At the same time I was getting the green bean casserole prepped, I also put a small potato on to boil. Nothing fancy about it, just a potato, but you can't have Thanksgiving dinner without it.
The last thing to do is make some gravy. You should have quite a bit of liquid left in your roasting pan. In a container with a lid on it, combine about a tablespoon of flour and a half a cup of water and shake until the two are combined. Pour it into the roasting pan and set it to boiling on the stove, stirring frequently, until it's thickened up a bit.
Hopefully you've managed to time pretty much everything right so all of your cooked stuff is done at around the same time. It gets a little hectic at the end there, which is why there are suddenly no more pictures. Until this one!
Ta-da! Enough to put you in a food coma and you didn't even have to go out an talk to anyone! Except maybe your mom, whom you may have called about thirty times asking about how to cook your fabulous dinner. Thanks, Mom!


